Introduction
As Wildfly is a modular Application server, the configuration of the Oracle datasource can also be done in a modular fashion (the preferred way). This document describes how you can add the Oracle JDBC driver to Wildfly 8 and define the JNDI name the connection will be available.
Create module
The directory where you installed WildFly will be referred to as %WILDFLY%.
The first step in creating a new module for the Oracle JDBC driver, is to create a certain directory which will contain the additional jar file and module configuration.
So go to the directory %WILDFLY%/modules/system/layers/base and create the following structure underneath it: oracle/jdbc/main
In this directory place the ojdbc.jar file which contains the driver.
The contents of the module.xml file that you need to create in the same directory is as follows :
<?xml version="1.0" encoding="UTF-8"?>
<module xmlns="urn:jboss:module:1.0" name="oracle.jdbc">
    <resources>
        <resource-root path="ojdbc6.jar"/>   (1)
    </resources>
    <dependencies>                           (2)
        <module name="javax.api"/>
        <module name="javax.transaction.api"/>
    </dependencies>
</module>-
This contains the name of the jar file. You can repeat this line if your module needs multiple jar files.
-
This defines the dependencies to other modules.
Now that we have the correct files in place, we can add the module. In this case I’ll add the module to the standalone profile, but you can follow the same procedure for the other profiles.
Open the file standalone.xml within the directory %WILDFLY%/standalone/configuration.
And look for the text com.h2database.h2, you will find it in a tag driver.
<?xml version="1.0" encoding="UTF-8"?>
<server xmlns="urn:jboss:domain:2.0">
...
        <subsystem xmlns="urn:jboss:domain:datasources:2.0">
            <datasources>
...
                <drivers>
                    <driver name="h2" module="com.h2database.h2">
                        <xa-datasource-class>org.h2.jdbcx.JdbcDataSource</xa-datasource-class>
                    </driver>
                </drivers>
            </datasources>
        </subsystem>
...
</server>
Add within the drivers section, add an entry for the Oracle JDBC driver.
<driver name="OracleJDBCDriver" module="oracle.jdbc"/>And don’t forget to save this file.
Define datasource
In the next step, we can create the datasource. Now we can use the Administration console where you can define it through a GUI.
So fireup the Wildfly server, for instance by executing the standalone.bat or standalone.sh script. And open the console on the url http://localhost:9990/console in your browser.
Select the tab Profile in the top left corner of the page, the Datasources menu should now open by default. If this is not the case, you can find it under Subsystems / Connector / Datasources.
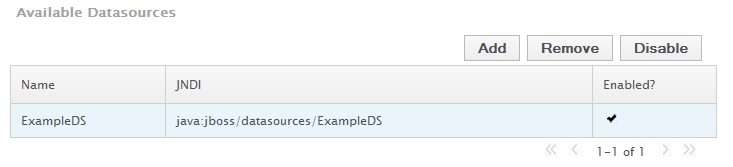
You can see on the page the list of datasources which are already defined. With the Add button you can create additional ones.
In the first step we can name our pool, I filled in squad, and the JNDI name under which it will be available. This should start with java:/ and in my case I typed java:/squadDS.
On the second page of the wizard, we have to select our JDBC driver. And if everything went well when we added the module, we should see here the OracleJDBCDriver name we have specified.
Select it, and on the last page, we can fill in the JDBC connection URL, like jdbc:oracle:thin:@127.0.0.1:1521:xe, user name and password. Security domain can be left blank.
The Datasource is now added, and after we have activated it, select the row and click on the enable button, we can test it.
Select the connection word under the table, it are actual tabs in a tabview, and there you find the Test connection button.